Introducing the Character API
 This tutorial series provides a step-by-step introduction to the capabilities of the 'animate' and 'lipsync' api. It provides
specific techniques and code snippets as it builds up to a Reference Implementation based on Character API and Amazon Polly.
This tutorial series provides a step-by-step introduction to the capabilities of the 'animate' and 'lipsync' api. It provides
specific techniques and code snippets as it builds up to a Reference Implementation based on Character API and Amazon Polly.
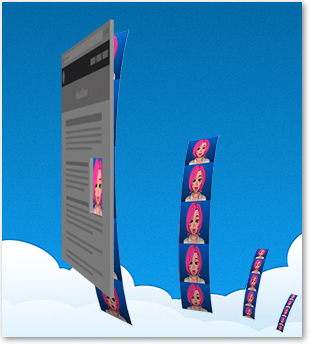
With the Character API, your app can use image strips that are downloaded from the cloud, and then looped and seamlessly switched using common JavaScript and CSS techniques. Each strip is fully specified by the parameters of its URL. Strips with new combinations of parameters are created as needed using cloud-computing resources, and then cached for rapid delivery to your application, be it mobile or desktop.
Image strips are easy to understand and work with. Later in the tutorial you will see how most Character API applications actually use texture maps, also known as sprite sheets. A texture map consists of many smaller images packed densely together into a larger image, along with instructions on how to compose the smaller images to form a given frame.
As you go through this API, it will be helpful to try out the examples. But to do so you will need your own Account and API Key, from the AWS Marketplace. You do not need any other product to use the Character API. The API usage itself is metered at $0.007 per call, with unlimited caching.
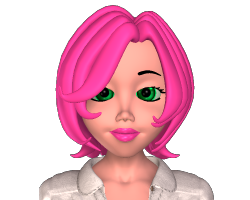
The main endpoint of the Character API is 'animate'. This is a GET endpoint, and is completely stateless. The only required parameters are an API key, 'character', 'version' and 'format'.
You can use it with no action to create a still image:<img src="http://api.mediasemantics.com/animate?key=xxxxxxxxxxxxxxxxxxxxxxxxx&character=CarlaHead&version=1.1&format=png&strip=true"/>
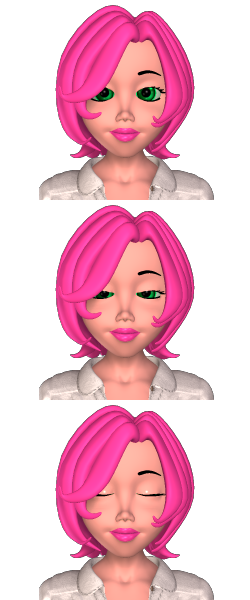
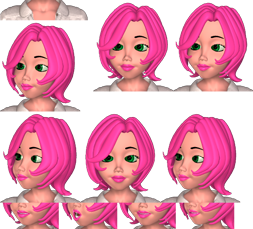
Or you can use it with an action to create a vertical strip of frames:
<img src="http://api.mediasemantics.com/animate?key=xxxxxxxxxxxxxxxxxxxxxxxxx&character=CarlaHead&version=1.1&format=png&action=blink&strip=true"/>
You can use 'animate' to produce a background image for a div. The CSS 'height' and 'backgroundPosition' attributes make it easy to create a sliding window on the image strip so that you see only one frame at a time:
<div id="anim" style="background-image:url(http://api.mediasemantics.com/animate?key=xxxxxxxxxxxxxxxxxxxxxxxxx&character=CarlaHead&version=1.1&action=blink&format=png&strip=true); width:250px; height:200px">
</div>
We can set the div's height to 200, which is the height of one frame within the strip, so only the first frame of the strip is showing. Let's write some code to show the rest:
<script>
    var a = [0, 1, 2, 1, 0, 0, 0, 0, 0, 0, 0, 0, 0, 0, 0];
    var frame = 0;
    setInterval(function() {
        var div = document.getElementById("anim");
        div.style.backgroundPosition = "0px -" + a[frame] * 200 + "px";
        frame++;
        if (frame == a.length) frame = 0;
    }, 1000/12);    // 12 fps
</script>
The array 'a' has a list of frame indices within the strip. We set a timer to run at 12 frames per second. The variable 'frame' is an index into this array. On each tick of the timer, the expression 'a[frame]' tells us which image to display within the strip. We use the backgroundPosition property to slide the strip to the right position. The backgroundPosition property takes an 'x' value and a 'y' value, but the 'x' value is always 0. With a 'y' of 0, we display the first frame (frame 0) of the strip. With a 'y' of -200 we display the second frame, and so forth.
The end result is that you see the character periodically blink:
Note that the Reference Implementation uses the javascript requestAnimationFrame() instead of setInterval(), for better animation performance. It also uses a simple technique to drop frames if needed, to maintain a consistent animation speed.
You will soon see that the actions you provide to a character can be quite a bit more complex than just blinking. In fact, the idea is that you tell the character what you want it to do at a high level, using actions such as Look, Point, and Say. Later in this tutorial we'll show how the Character API can create the frame array you saw in the code above, so that you don't have to.
But first, consider what happens when you switch the 'backgroundImage' attribute of the div. For example we could start our div with a still and then switch it to the blink strip. Notice how the first frame of the blink strip is identical to the still. Character API strips normally start and end in a neutral position precisely so that you can switch between them with no "jumps". Of course it does take time to download the next strip, so in general we always preload it, so that the visual switch can happen in a seamless manner, without any "blank" periods between strips.
The ability to stitch together different image strips as needed is sometimes referred to as "non-linear" media, and is key to allowing characters to react to user events, and present personalized information, such as a stock quote, or tomorrow's weather.
The Character API is cloud-based, and easily scales to meet your traffic needs. You can think of it as a huge collection of character images and image strips that are always at your disposal. Really the images are created "just-in-time", to your requirements, and then cached.
While you pay a fraction of a penny for each call to the Character API, you are free to cache the results on your own server, by implementing a server-based animation cache. This way you only access the Character API when your very first customer views a particular animation, and thereafter the request comes directly from your server's cache. Not only is this allowed, but it is actually the preferred way to use the API for applications involving web services, chatbots, and text-to-speech. By moving the logic that calls the Character API to your own server, you are able to leverage other cloud-based services from different vendors.
Character animation using image strips is a compromise between several different factors, and as such, it may not be the best solution in all cases, but it tends to perform well given today's distribution of bandwidth, client, and server-based compute power.
This tutorial will show you how to generalize the code shown above to create a simple and efficient client-side engine for loading and playing back animation. While the Character API is optimized for the delivery of non-linear animation over the web, you can also use it to generate sequences of images that can be stitched together into an mp4 video, using a widely-used public domain compression tool called 'ffmpeg'. While this is not covered in this tutorial, most of the topics discussed in this tutorial still apply.
Design Choices
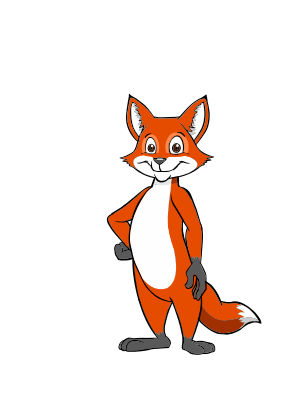
The Character API includes a wealth of characters in several different styles, from cartoons to realistic figures.
<img src="http://api.mediasemantics.com/animate?key=xxxxxxxxxxxxxxxxxxxxxxxxx&character=CSFelixFoxFront&version=1.0&format=png&strip=true">
<img src="http://api.mediasemantics.com/animate?key=xxxxxxxxxxxxxxxxxxxxxxxxx&character=TomHead&version=1.2&format=png&strip=true">

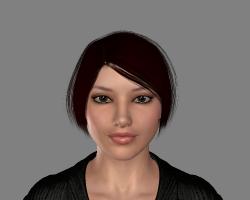
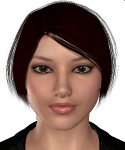
<img src="http://api.mediasemantics.com/animate?key=xxxxxxxxxxxxxxxxxxxxxxxxx&character=SusanHead&version=3.0&format=png&strip=true">

Many of them, including Susan, come in different styles, each with a different camera angle, zoom factor, etc. For example Susan also comes in Bust and Body styles.
<img src="http://api.mediasemantics.com/animate?key=xxxxxxxxxxxxxxxxxxxxxxxxx&character=SusanBust&version=3.0&format=png&strip=true">

<img src="http://api.mediasemantics.com/animate?key=xxxxxxxxxxxxxxxxxxxxxxxxx&character=SusanBody&version=3.0&format=png&strip=true">
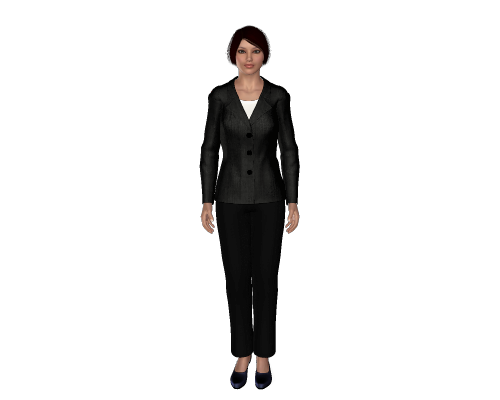
Everyone wants their character to look unique, but the reality is that there is a high cost to developing a custom character from first principles. Thankfully, the Character API includes built-in character customization. Many of the stock characters can be reclothed and recolored to create a wide range of effective characters.
For example, let's say you like Susan, but you want to lose the jacket.
<img src="http://api.mediasemantics.com/animate?key=xxxxxxxxxxxxxxxxxxxxxxxxx&character=SusanBody&version=3.0&over=none">
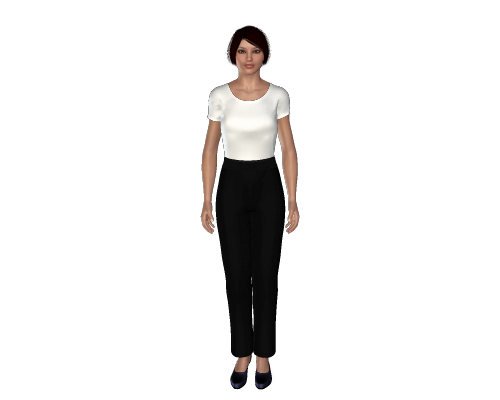
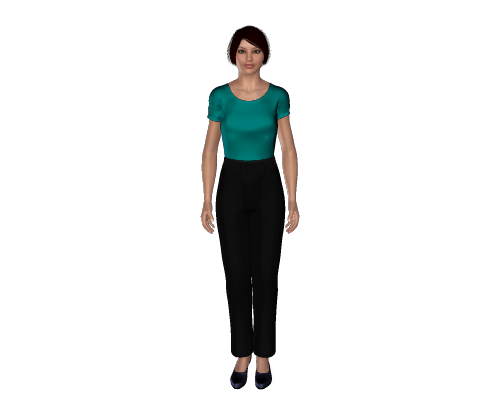
That's nice, but maybe her white shirt disappears into the background on your website. Maybe you want to pick up a color to match a corporate logo:
<img src="http://api.mediasemantics.com/animate?key=xxxxxxxxxxxxxxxxxxxxxxxxx&character=SusanBody&version=3.0&over=none&topcolor=008080">
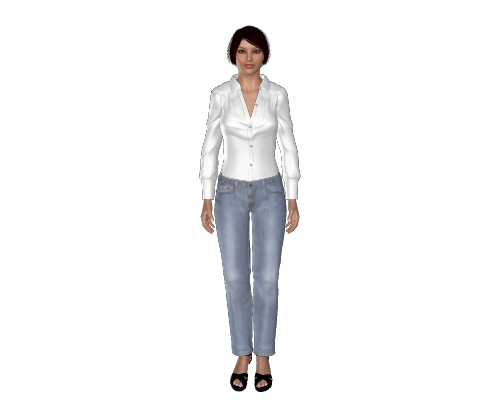
Some character styles have packages of "addons" that represent different clothing or hair pieces, to give you an even wider range of appearances. Maybe on the weekend you make her show up totally casual.
<img src="http://api.mediasemantics.com/animate?key=xxxxxxxxxxxxxxxxxxxxxxxxx&character=SusanBody&version=3.0&addons=ClothesPack1,ClothesPack2&addonversions=3.0,3.0&foot=sandals1&bottom=jeans1&top=blouse1&over=none&format=png&strip=true">
Maybe your application calls for a medical professional, a policeman, or a soldier. Simply dial up the right clothing from several Career addons.
You may be wondering why a version always needs to be specified for each character and addon. To improve edge caching, the cache expiration time on the resulting images is effectively infinite. New versions of a character or an addon are released from time to time, but the old ones are never removed. Strict versioning allows you to deploy updated characters, which may include updated appearances or behavior, on your own schedule, by incrementing the version number in your URL.
Each character supports a certain set of actions. In general, all characters can perform a range of actions related to the presentation of information - speaking, gesturing, emoting.
Actions that target specific body parts can often be combined. For example here is the "lookleft" action, loaded into a div similar to how we did Carla's blink earlier in this tutorial:
<div id="anim1" style="background-image:url(http://api.mediasemantics.com/animate?key=xxxxxxxxxxxxxxxxxxxxxxxxx&character=SusanBody&version=3.0&action=lookleft&format=png&strip=true); width:500px; height:400px">
</div>
And here is the "gestureleft" action:
<div id="anim1" style="background-image:url(http://api.mediasemantics.com/animate?key=xxxxxxxxxxxxxxxxxxxxxxxxx&character=SusanBody&version=3.0&action=gestureleft&format=png&strip=true); width:500px; height:400px">
</div>
Here are both actions together:
<div id="anim1" style="background-image:url(http://api.mediasemantics.com/animate?key=xxxxxxxxxxxxxxxxxxxxxxxxx&character=SusanBody&version=3.0&action=[par][lookleft][gestureleft][/par]&format=png&strip=true); width:500px; height:400px">
</div>
If you have a single action, you can specify it as a single word, as we have seen so far. But in general, actions and sequences of actions are represented as tags in square brackets. So
[lookleft][gestureleft]
means look left, then gesture left. To do both in parallel, we do:
[par][lookleft][gestureleft][/par]
New characters, styles, and addons are constantly being added to the catalog, often by request. Media Semantics, the makers of the Character API, are also able to add custom characters and addons that are tied to a specific account.
Bandwidth Considerations
The image strip approach to character animation is sensitive to bandwidth. There are several choices that you can make that directly affect the size of the image strips, namely Compression Type, Frame Size, and Number of Frames.
Compression Type
Images strips are coded using either the PNG or the JPEG format, as determined by the 'format' parameter on the Animate URL. Which you choose depends on a couple factors. PNG animation includes transparency, while JPEG does not. So if your application includes a character that appears over top of other content on your website, then you must use PNG. PNG tends to be very efficient for cartoon characters, because of the long runs of solid color. Being a lossless format, it will faithfully capture every pixel.
On the other hand, JPEG is especially good at coding realistic or 3D characters. The JPEG format comes with a quality parameter - if not specified the value 75 is used. While the bandwidth can be reduced by lowering the quality, the result will be more artifacts, particularly when you do have a solid run of color. Furthermore, if you are switching from one image strip to another with non-linear media, bear in mind that the switch from the last frame of one strip to the first frame of another strip may result in a slight difference in these artifacts, as the JPEG algorithm uses different tradeoffs for different image strips. These differences tend to be hard to notice in practice, in particular for higher compression quality factors.
A more significant consideration with JPEG is what to do with the background, since JPEG images are always fully opaque. By default the background on a jpeg strip will be white. You can provide a solid color with the 'backcolor' attribute.
<img src="http://api.mediasemantics.com/animate?key=xxxxxxxxxxxxxxxxxxxxxxxxx&character=SusanHead&version=3.0&backcolor=808080&format=jpeg&strip=true"/>
You can also do a simple vertical gradient:
<img src="http://api.mediasemantics.com/animate?key=xxxxxxxxxxxxxxxxxxxxxxxxx&character=SusanHead&version=3.0&backgradient=vertical&backcolor1=0060CC&backcolor2=003366&format=jpeg&strip=true"/>

Finally you can specify the URL for an image to use as a background using 'backimage'. The image can be either PNG or JPEG format. If the background is not the exact same size as the size of a single frame in your strip, then the CSS "cover" and "center" behaviors will apply, that is the image will be resized to cover the entire size of the final image, and then centered. Some of the image may be cut off if the aspect ratios differ. You provide the url to the background as a parameter to the Animate URL. For example let's say you had the following background url:
<img src="http://www.mediasemantics.com/img/tutorial/onesandzeroes.jpeg"/>

Since this information contains colons and slashes, we'll need to use the JavaScript escape function to pack it into our url.
<img id="anim1">

<script>
var img = document.getElementById("anim1");
img.src = "http://api.mediasemantics.com/animate?key=xxxxxxxxxxxxxxxxxxxxxxxxx&character=SusanHead&version=3.0&format=jpeg&strip=true&backimage=" +
          encodeURIComponent("http://www.mediasemantics.com/img/tutorial/onesandzeroes.jpeg");
</script>
By carefully selecting a background image, you can make your character blend in naturally with your site while still being able to take advantage of the better compression afforded by the jpeg format.
If you use an image, be sure to place it in a publicly accessible location. This URL may be read by the Character API when it needs to generate a new strip.
IMPORTANT: If you want to change the background image, please upload your new file under a different name, and use that new name in the 'backimage' parameter. For efficiency, the Character API assumes that the image at a given URL is invariant, and can be cached indefinitely.
Frame Size
Clearly the size of each frame in your strip has a direct impact on the size of the strip in kilobytes. Unless otherwise specified, the frame width and height is a standard size that matches the style of the character. For example, headshots tend to be 250x200 pixels.
You can specify a different frame size using the 'width' and 'height' attributes.
<img src="http://api.mediasemantics.com/animate?key=xxxxxxxxxxxxxxxxxxxxxxxxx&character=SusanHead&version=3.0&format=png&width=125&height=150&strip=true">

As you can see, the character does not resize - all we are doing is cropping the image. With this tighter cropping you will normally need to adjust the position of the character to center it correctly. You can do this with 'charx' and 'chary', the horizontal and vertical offset to be applied to the character. These are values in pixels, with positive y moving the character down within the frame.
<img src="http://api.mediasemantics.com/animate?key=xxxxxxxxxxxxxxxxxxxxxxxxx&character=SusanHead&version=3.0&format=png&width=125&height=150&charx=-60&chary=-30&strip=true">
Cropping down a character using width, height, charx, and chary is a great way to achieve bandwidth savings, but it is also an important consideration in determining how much real-estate the character takes on your page. The default size of a full body character is 500x400, which is very wide. This can be cropped substantially, but bear in mind that some actions, such as pointing, run the risk of being cut off. If you crop a body character to just the head, then you will want to avoid a pointing action altogether, as it won't be seen.
One thing to bear in mind is that the entire image strip can be scaled up or down. Modern browsers are very good at scaling images, however the results are only as good as the pixel density you start out with. You can take a 250x200 pixel image and scale it down to half size and it will still look great. But there is little point in doing this, since you are downloading more information than you need. Likewise, you can scale the cropped image above to double its effective size with NO loss in bandwidth, but the results may look a little blurry.
<img src="http://api.mediasemantics.com/animate?key=xxxxxxxxxxxxxxxxxxxxxxxxx&character=SusanHead&version=3.0&format=png&width=125&height=150&charx=-60&chary=-30&strip=true" style="width:250px">
Some characters support different densities, e.g. 2x, 3x, making them more appropriate for viewing at a large size.
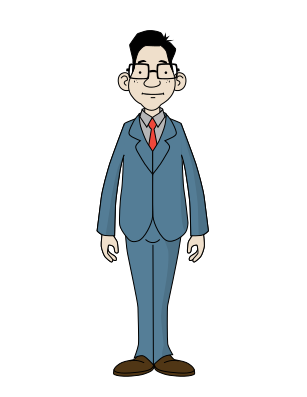
Some characters, notably vector-based characters, allow you to use the 'charscale' attribute to specify a scale. Consider the Charlie character. The default frame size is 307x397.
<img src="http://api.mediasemantics.com/animate?key=xxxxxxxxxxxxxxxxxxxxxxxxx&character=Charlie&version=1.0&format=png&strip=true"/>
Think of the 'charscale' factor as scaling up the entire character, default frame size and all. So the frame size for charscale=1.5 is 460x595.
<img src="http://api.mediasemantics.com/animate?key=xxxxxxxxxxxxxxxxxxxxxxxxx&character=Charlie&version=1.0&format=png&charscale=1.5&strip=true"/>

You can then further crop this down to the head with a smaller frame size, as we saw before. Characters that support a 'charscale' are based on vector art, and are re-rendered so as to provide you with the maximum amount of detail.
Scaling for raster characters should always occur at the client, on the assembled character image, to prevent scaling artifacts at the seams of the animation. For raster characters, a 'density' parameter functions similar to scale, but at discrete values, typically 1, 2, or 3. For example specifying '&density=2' would allow the engine to select from art that was pre-rendered at double the size and resolution. A density setting of 2 would be ideal for scaling up to 200% without any blurriness.
Number of Frames
Clearly the size of the image strip is directly related to the number of frames in the strip. Recall how we used an array to encode the actual sequence of images strip indices in our blink animation:
<script>
    var a = [0, 1, 2, 1, 0, 0, 0, 0, 0, 0, 0, 0, 0, 0, 0];
</script>
At the default rate of 12 frames per second, this allowed us to achieve 15 frames, or about 1 1/4 seconds worth of animation out of a strip with 3 frames. We furthermore looped the sequence to get an infinite length of animation.
Consider a strip of a character talking. In a cartoon, it is acceptable for a character's head to move very little, or not at all, as the mouth forms different words. Since there are only about 9 different positions (visemes), the resulting image strip might have as few as 9 images, even if the character speaks for several minutes. In practice it will be more, since the character will need to blink occasionally. On the other hand, when we have a realistic character talking, we expect to see her head move frequently while speaking. So the complexity of the action, including the amount of automatic action you allow, has a direct impact on the total height of the image strip.
Clearly you wouldn't want to put an hour of speech into a single strip - the trick is to break it down into separate image strips that are then stitched together. This lets you overlap the playback of one image strip with the creation of the next. It also lets you play image strips at random, or based on the user's actions. If you succeed, your user will get the impression that the character has a "life of its own". But to achieve this we need a better playback engine.
Improving the Playback Engine
Let's take advantage of everything we've learned to create a more general playback engine for use with the Character API.
Start with a div to contain our animation:
<div id="anim"></div>
Now let's add a link that will cause the character to perform an action:
<a href="javascript:execute('[blink]')">[blink]</a>
Now some code to set up some global variables and initialize the div:
<script>

init();

var animateBase;
var savedURL;
var data;
var frame;
var timerId;
var state;

function init() {
    animateBase = "http://api.mediasemantics.com/animate?character=CarlaHead&version=1.1&format=png&strip=true";
    state = "";
    var element = document.getElementById("anim");
    element.style.width = "250px";
    element.style.height = "200px";
    element.style.backgroundImage = "url(" + animateBase + ")";
}
It's convenient to have an 'animateBase' variable that contains all the parameters that are invariant for your application. The meaning of the other variables will become clear in due course.
As a side effect of producing the image strip, the Character API produces some animation data that can be retrieved from the response header "x-msi-animationdata". In the case of action=blink, it produces:
{"images":3, "imageHeight":200, "initialState":"", "frames":[[0],[1],[2],[1],[0]], "finalState":"", "fps":12}
The first thing we need to do is to call the Character API and obtain the image data and the animation data.
function execute(action) {
    savedURL = animateBase + "&action=" + encodeURIComponent(action) + "&state=" + encodeURIComponent(state);
    var xhr = new XMLHttpRequest();
    xhr.open("GET", savedURL, true);
    xhr.addEventListener("load", function() {
        data = JSON.parse(xhr.getResponseHeader("x-msi-animationdata"));
        var preload = new Image;
        preload.onload = function() {animate();};
        preload.src = savedURL;
    }, false);
    xhr.send();
}
Here is the beginning of the animate() code.
function animate() {
    var element = document.getElementById("anim");
    element.style.backgroundImage = "url(" + savedURL + ")";
    element.style.backgroundPosition = "0px 0px";
Next we set the backgroundImage of the actual div to the image we just preloaded. Because of local caching, only the initial XMLHttpRequest would have incurred an actual Character API call, and then only if the image strip was not already cached in the browser cache from an earlier request.
Finishing off animate(), we set the global 'frame' to be 0 and start an interval timer.
    frame = 0;
    timerId = setInterval(function() {animateTick()}, 1000 / data.fps);
    state = data.finalState;
}
Here is the basic outline for the animateTick() function, which gets called at 12 frames per second.
function animateTick() {
    // exit cases
    if (frame >= data.frames.length)
    {
        clearInterval(timerId);
        animateComplete();
        return;
    }
    // first arg is the image frame to show
    var element = document.getElementById("anim");
    element.style.backgroundPosition = "0px -" + data.frames[frame][0] * data.imageHeight + "px";
    frame++;
}

function animateComplete() {
}
The first thing we do in animateTick() is check if the frame index is still in bounds. If it falls off the end, we clear the interval timer and call animationComplete(). Assuming we haven't completed, we set the backgroundPosition of the div to "scroll" the image strip through the window one frame at a time, indirecting through data.frames[frame] to get the actual image index in the image strip to play. You will recognize this as the same code that we ran in our first blink animation.
Go ahead and try clicking the "blink" link now:
Character State
So far we have dealt only with actions that begin and return to a very special "default" state represented by an empty string. But consider what happens when we run the action [lookleft].
The data for this action looks like this (note the finalState value):
{"images":7, "imageHeight":200, "initialState":"", "data":[[0],[1],[2],[3],[4],[5],[6]], "finalState":"front,handsbyside,lookleft,mouthnormal,eyesnormal", "fps":12, }
In the code shown in the previous section, we had a global variable 'state' that kept track of the state during the handoff from one strip to another. The variable gets passed into the request as the Character API parameter 'initialState', allowing the API to determine the starting position for the action. This starting position is repeated in the animation data as 'initialState', along with the state 'finalState' that results from performing the action, where it is then harvested and put back into the global "state" variable for use in setting up the next action.
Let's put this together with a simple system of 3 actions.
Now see what happens when you press "blink" if your character is the default state or the looking-left state.
Your application may be fine with always returning to the default state between strips, however this simple mechanism gives you a whole new dimension of control to work with. For example you might implement an "idle controller" that calls execute() periodically with 'blink', and with 'lookleft', 'lookupleft', etc. based on where the user clicks on the page.
You may want to stick with the simple assumption that all strips begin and end with the default state (""). As a convenience, you can add a 'return=true' parameter in your Character API call. This will ensure that, regardless of the final state of the character, it will always return to the default state.
Smooth Interruption
In some cases you will want a user's input to interrupt one action and start another. So lets add an abort() function that will stop the current action.
function abort() {
    // not very smooth!
    clearInterval(timerId);
    init();
}
This would cause the character to instantly "pop" back to its initial state - not very smooth. To do better, we can take advantage of "recover=true". With this option, the Character API generates some additional frames at the end of the frame array that are used to smoothly interrupt an action.
We'll use another global 'stopping'.
var stopping = false;
Our new, improved, abort() function just does this:
function abort() {
    stopping = true;
}
We'll add our 'recover' option:
animateBase = "http://api.mediasemantics.com/animate?character=CarlaHead&version=1.1&format=png&recover=true&strip=true";
Let's set up another action to illustrate.
<a href="javascript:execute('[lookleft][pause][lookuser]')">lookleft, pause, lookuser</a>
The frame data returned is as follows:
[[0],[1],[2],[3],[4],[5],[6,25],[6,25],[6,25],[6,25],[6,25],[6,25],[6,25],[6,25],[6,25],
[6,25],[6,25],[6,25],[6],[5],[4],[3],[2],[1],[0,-1],[6],[5],[4],[3],[2],[1],[0,32],[0,-1]]
When a frame has a second argument, it's meaning is "jump to this frame if you are stopping". The special value -1 in the second argument indicates that this is the end of the animation, and it is needed because there are now multiple places where the animation can stop.
We'll modify our animateTick() as follows:
function animateTick() {
    // exit cases
    if (frame == -1 || frame >= data.frames.length)
    {
        clearInterval(timerId);
        animateComplete();
        return;
    }
    // first arg is the image frame to show
    var element = document.getElementById("anim");
    element.style.backgroundPosition = "0px -" + data.frames[frame][0] * 200 + "px";
    // second arg is -1 if this is the last frame to show, or a recovery frame to go to if stopping early
    if (data.frames[frame][1] == -1)
        frame = data.frames[frame][1];
    else if (stopping && data.frames[frame][1])
        frame = data.frames[frame][1];
    else
        frame++;
}
To see this in action, first press the first link and watch the animation proceed uninterrupted. Then try it again, but immediately press abort().
Not every frame will have recovery information - generally if the character is mid-action, it will wait until the action is complete to recover. You can think of abort() as being a request to "hurry up" the animation. Note that the "recovery=true" option generally does not increase the size of the image strips generated - it just adds a little more information that allows our client-side code to smoothly recover from an interruption.
External Commands
There are times when you will want to synchronize events in your application with key points in your animation. You can use the <cmd/> action to trigger an event that you can handle in your code. You can also specify parameters that are passed to your function as an object.
Consider the following action XML:
[lookleft][cmd target="1"][lookuser]
The attribute can be anything you like, and you can have several of them. The data generated for this command looks like this:
[[0],[1],[2],[3],[4],[5],[6,0,{"target":1}],[5],[4],[3],[2],[1],[0]]
To handle the third frame argument we need one more line in our animateTick() function:
    // third arg is an extensible side-effect string that is triggered when a given frame is reached
    if (data.frames[frame][2])
        embeddedCommand(data.frames[frame][2]);
Now we can implement a simple embeddedCommand() function:
function embeddedCommand(data) {
    console.log(JSON.stringify(data));
}
Let's give this a try. A console log output should appear the instant Carla's head reaches the looking-left state, if you have your Developer window's Console tab open on this page.
Playing Audio
To a first approximation, you add audio to an animation by playing an mp3 file with the same length as the animation.
In order to play audio on a mobile device, you need to take care to load the audio file in direct response to a user event, such as a touch. However it is perfectly okay to pause the audio on the "canplaythrough" event, load some animation, and then restart the audio. Let's illustrate:
Start with a new tag somewhere on your site:
<audio id="audio"></audio>
Now create a new function playAudio():
function playAudio(action, file) {
    var audio = document.getElementById("audio");
    audio.oncanplaythrough = function() {
        audio.pause();
        // Now load the animation
        execute(action);
    }
    audio.src = file;
    audio.play();
}
We can then add this to the end of the animate() function developed before:
function animate(data) {
    // Start the animation...

    // Start the audio, if any
    var audio = document.getElementById("audio");
    audio.play();
}
Now let's invoke playAudio() with the following action:
[say]The quick brown fox.[/say]
and an audio file that you can listen to here:
Here is the result so far.
As you can see, there is one fatal problem with this arrangement - the lips don't move. Indeed, how can they when the Character API has no knowledge of the audio file that is playing?
The LipSync API
To make the character's mouth move, we first need to analyze the audio file for lip sync information. If you are using pre-recorded audio files, then you can use the LipSync API through this sample. Simply upload your audio file and you will get back a block of phoneme data. When you do this for our sample audio file, we get something like this:
z0kjh+/u+mS7vhPB4YZT2DsBdtd+WE1Gix5UvFFDhBdTIGYRciap0UW+XTHR9Nlk9JaKSxbFKRrLPmKQc50hDkbPh
JQD0Ql4pxmTp49Arujy+6y0dUD1rIk8BR2thEBkj9DZEi+Ba/lp6UmAvo69YcIUUK+CXPFcRZ4ucV+DdDo=
You can think of this as the "lipsync signature" of the audio file. It represents all the data that is needed to produce a lip-synced animation. Now let's add a 'lipsync' parameter to playAudio(), and pass this information through to execute():
function playAudio(action, file, lipsync)
{
    ...
    execute(action, lipsync);
    ...
}
and finally onto the Animate URL inside execute():
function execute(action, lipsync) {
    ...
    savedURL = animateBase + "&action=" + encodeURIComponent(action) + "&state=" + state + "&lipsync=" + encodeURIComponent(lipsync);
    ...
}
Now let's try again, with the lipsync data we obtained above.
Now we see that the lips move appropriately.
Timing of actions to audio
You may already have an intuitive sense for how the Character API aligns actions with the associated audio. The rules can be formalized as follows:
- An action starts playing as soon as it becomes eligible.
- Actions always play in parallel with the audio, i.e. the audio never stops for an action.
- If an action appears before any text, it becomes eligible immediately.
- If an action is preceded by text, then it becomes eligible as soon as the preceding text is spoken.
- If an action becomes eligible when another action is still playing, then the action is queued, and begins playing as soon as the preceding action ends.
- By default, only one action can play at a time. Two or more actions can be played in parallel if they affect different parts of the character, such as the head and the arms, but only if they are wrapped with [par] and [/par].
- The [pause] action works like any other action in terms of timing, but has no effect on the character.
- THe [cmd] action works like any other action in terms of timing, but has no effect on the character and takes no time. It results in an event at runtime when it is encountered.
- The audio segment is extended with silence as necessary in order for the last action to complete.
Using Textures
One limitation of image strips is that you frequently have only one portion of an image that is animating. In our blink strip at the beginning of this tutorial, only a rectangular portion around the eyes change at any given time. A more efficient way to encode animation is to use texture maps. So far we have been using image strips only because they are easy to understand and work with. If you omit &strip=true then you get the default behavior, which is to create a larger rectangular image that packs many pieces of character imagery of different sizes. Such an image is often called a "sprite sheet", "texture map", or simply "texture". For example the result of running the action
[say][lookleft]test[/say]
looks like this:
Moreover, the control data contains a new section called "recipes", which represents the instructions for creating a given frame. Instead of the first argument of each frame being an index into the image strip, it is now an index into the recipes array:
{..., "frames":[[0],[1],[2],[3],...], ..., "recipes":[[[0,0,0,0,320,240],[92,135,190,240,237,106],[117,41,0,240,190,200]], ...,
                                                      [[0,0,0,0,320,240],[117,41,0,240,190,200],[173,163,190,389,77,43]]}
A given frame is created by layering several images cut out from the texture image - typically the background, the base of the body, a head, some eyes, a mouth. The bandwidth savings result from reusing images: small mouth or eye images can be pasted on top of the same head image to create several different frames. A recipe is simply an array of layers. Each layer is represented by an array of the form:
[target-x, target-y, source-x, source-y, width, height]
One way to do this composition is to create an HTML5 Canvas the full size of your character, and use the drawImage javascript API to copy each layer from the source coordinates in the texture map to the target coordinates in the canvas. To do this, you might use code such as the following:
var canvas = document.getElementById("myCanvas");
var ctx = canvas.getContext("2d");
ctx.clearRect(0, 0, canvas.width, canvas.height);
var frameRecord = data.frames[frame];
var recipe = data.recipes[frameRecord[0]];
for (var i = 0; i < recipe.length; i++) {
    ctx.drawImage(texture,
        recipe[i][2], recipe[i][3],
        recipe[i][4], recipe[i][5],
        recipe[i][0], recipe[i][1],
        recipe[i][4], recipe[i][5]);
}
If you are developing a game, then you may already use a more sophisticated approach to animation such as WebGL. Modern browsers use GPUs (Graphic Processing Units) to process 2D images efficiently. In particular, the entire texture is loaded directly into fast GPU memory, and changing frames becomes essentially a matter of changing a few pointers into the image.
While you can use WebGL libraries, such as Pixi JS, with the Character API, they are not needed to achieve good performance on most applications.
Using Named Secondary Textures
We talked about how a practical application will consist of several short segments of character animation that are looped and switched as needed. Typically each such segment consists of a sentence of text accompanied by one or more actions. The Reference Implementation uses a further technique to improve the reuse of imagery between segments.
The idea is to load multiple textures instead of just one, however all but one of them are special "named" textures that are known to be highly reusable, and hence more likely to be cached in the browser. To obtain a named texture, you use the 'texture' parameter:
http://api.mediasemantics.com/animate?key=xxxxxxxxxxxxxxxxxxxxxxxxx&character=CarlaHead&version=1.1&format=png&texture=LookLeft
Here is the named texture "LookLeft":

Consider what happens when we repeat the command from the previous section with the 'with' parameter:
http://api.mediasemantics.com/animate?key=xxxxxxxxxxxxxxxxxxxxxxxxx&character=CarlaHead&action=&with=default,LookLeft test
The 'with' parameter tells Character API that you are coming in with the 'default' and 'LookLeft' textures already, and that this imagery should not be included in the resulting image. Here is the result:
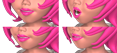
Notice how the use of secondary textures allows us to subtract these common images from the result, leaving just the mouths in this case. The resulting animation data still contains complete instructions for assembling the final image. The recipe layer has an additional element that is an index into an array of named textures. This last member is present only for layers that are elided from the image.
[target-x, target-y, source-x, source-y, width, height, named-texture-index]
It represents a 0-based n index into a new section of the the data named 'textures':
{..., "recipes":[[[0,0,0,0,320,240,1],...]], "textures":"default,LookLeft"}
Assuming that the named textures have been loaded into an array 'namedTextures', the new animation code to account for this might look like this:
for (var i = 0; i < recipe.length; i++) {
    var namedTextureIndex = recipe[i][6];
    if (typeof namedTextureIndex == "number")
        src = namedTextures[data.textures[namedTextureIndex]];
    else
        src = texture;  // regular texture
    ctx.drawImage(src,
        recipe[i][2], recipe[i][3],
        recipe[i][4], recipe[i][5],
        recipe[i][0], recipe[i][1],
        recipe[i][4], recipe[i][5]);
}
It is common to simply let 'animate' decide for us what textures to use. To do so, simply include &with=all:
http://api.mediasemantics.com/animate?key=xxxxxxxxxxxxxxxxxxxxxxxxx&character=CarlaHead&action=[say][lookleft]test[/say]&with=allwhen requesting an animation. By doing this, you promise to load all the provided textures in the "textures" section of the resulting data prior to starting the animation, remembering that there is a high likelyhood that the texture is already present in the browser cache, especially after the character has delivered a few messages.
Note that the special texture called 'default' that will be offered for every action - this is simply the first image you will likely request, and represents the default pose of the character, as indicated by the empty or missing 'action' parameter. This makes sense, since each new round of animation normally begins and ends in this default pose.
High-Level actions
We can distinguish between two types of actions. Automatic actions, such as blinking or random head movement, occur continuously, whether the character is presenting or idle. Deliberate actions, such as hand gestures or emotional responses, are often intimately associated with the message being delivered.
Authoring a character presentation normally begins with a script. As a practical matter, in can become quite tedious to insert action tags for automatic actions. Even deliberate actions can be be tedious, because deliberate movements will often consist of several individual "micro" actions involving different parts of the body (e.g. combining Look Right and Gesture Right). In addition, the selection of available micro actions can vary somewhat from one character style to another.
To simplify the authoring of character scripts, you normally associate a single, high-level action with an entire sentence, essentially indicating the manner in which the sentence is spoken. For example, scripts appear as follows in People Builder:

The Look At User selection means that no deliberate action takes place, and an empty text field indicates the action is performed silently. Each line in the script tells the character what do Do and what to Say.
If you are using the People Builder's Agent module to dynamically present material using javascript calls from the surrounding web page, then the equivalent API calls would be as follows:
myAgent.dynamicPlay({say:"This is a sentence with no deliberate action."});
myAgent.dynamicPlay({do:"gesture-right", say:"This is a sentence in which the character looks and gestures towards the right."});
myAgent.dynamicPlay({do:"happy"});
The same dynamicPlay() API is also available on the Character API Reference Implementation, for clients that use the Character API directly.
As of version 2.0 of the Character API, the ability to use high-level actions is part of the Charater API itself. Simply use the 'do' and 'say' parameters instead of 'action':
http://api.mediasemantics.com/animate?key=xxxxxxxxxxxxxxxxxxxxxxxxx&character=CarlaHead&do=look-right&say=test&with=all
A complete list of characters and their actions is available from the catalog API for use in authoring systems.
http://api.mediasemantics.com/catalog?key=xxxxxxxxxxxxxxxxxxxxxxxxx
There is no charge associated with this api. One thing to note is that low-level actions always assume Stage Right and Stage Left in their action names, for animator convenience, whereas high-level actions use House Right and House Left, for authoring convenience.
The high-level action system provides the Character API with some license to realize the actual animation as it sees fit, with knowledge of the audio timing and the range of animations available for the given character. Additionally, automatic actions, such as blinking, subtle head movements, and even some hand movements, are woven in automatically. This does involve some randomness, but a seeded random number generator is used based on a seed generated from the request itself. This means that if you ask for the same url again, you will get the exact same animation, even if some of the animation was generated randomly. As we saw earlier, this is an important principle in the Character API, and provides for caching and delivery efficiencies. You look closely, you may find that the automatic behavior can be slightly different if you change so much as one character in your message.
In some cases you might want to invoke a low-level Character API action that is not exposed as a high-level action. Or, you might want to invoke a specific combination of low level actions with more precise timing. To do so, simply specify the action tags in the 'say' parameter. The important thing is that for most applications you won't need to use action tags directly - just focus on the high-level behavior you want to associate with each sentence.
myAgent.dynamicPlay({say: 'I can blink 3 times [blink][blink][blink] rapidly.'})
You can use the character catalog to see how a given character reacts to a high-level action, either in isolation, or spoken with a sentence. You can also explore the lower level action tags available for each character. Bear in mind that only the higher level actions are stable across multiple characters, with broad exceptions: for example a head format will not include hand gestures. Actions are grouped into categories, such as Look and Point. The Conversational category includes actions that are intentional communicative acts, such as a head nod, that can be realized using facial gestures and/or hand gestures. The Emotive category includes actions that communicate an involuntary emotion, such as surprise or concern, that is nevertheless associated with the script. The Gestures category also contains communicative acts, but ones that require the hands to be visible, such a Palm Up. This category is absent for Head format characters.
We saw earlier that the [cmd] action can be used to notify you when a specific point is reached in your segment. In practice, with high-level actions, there is often only one important "culmination" point. For example the high-level action "look-left" culminates soon after the character completes the head motion. A default [cmd] tag for an event called the "apogee" is automatically inserted for such high-level actions. This event can be ignored, but it is usually the most convenient point to trigger any associated action. In the Builder, the "and" portion, if any, of a line is played on the apogee event, allowing for actions such as Look Left and Show, for example.
Speech Tags
If you are using Text-to-Speech, the low-level action tags are stripped out of the sentence before it goes to the TTS engine. TTS systems typically allow the text to be marked up with further XML tags using a the SSML (Simple Speech Markup Language) standard. For example, the tag <break time="1s"/> provides a silent pause in the actual audio. Modern TTS systems use context to generate the correct inflection and prosody, and this works well the vast majority of the time, however it occasionally becomes necessary to use SSML tags to provide more control. For example, you might want to pronounce 123 as "one, two, three" rather than "one-hundred-twenty-three". In SSML, you would write <say-as interpret-as="digits">123</say-as> to provide an explicit hint. You can sometimes avoid using a SAMPA tag by rewriting the text, e.g. "1, 2, 3", however the same text is also often used for closed-captioning, where you might want it to still appear as "123". It is a good practice to use clear prose that is easy to read and easy to speak, and then annotate it only where necessary using speech tags. Unfortunately SSML support can vary from one TTS engine to another, and the precise XML syntax can be complicated and unforgiving.
The People Builder and Character API Reference Implementation use square-bracket speech tags as an alternative to SAMPA. For example, you can use "A long [silence 1s] pause", or "The prefix [digits]123[/digits]", and the result is converted to the SAMPA tags introduced above.Speech tags can be used inside the People Builder's Say field:

and also in dynamic speech:
myAgent.dynamicPlay({say:"A long [silence 1s] pause"});
For a complete list of speech tags, please see KB113.
Continuous action
We mentioned that character applications typically consist of multiple segments, with each segment characterized by at least one texture image and a data file for decoding that texture. We can smoothly switch from one segment to another by ensuring that each succesive segment begins in the same state as the previous one left off. For simplicity, most segment begin and end with a single "default" state, or pose, of the character.
In some applications, such as video, there is a continuous stream of action and audio to be delivered. In others, such as interactive agents or gaming, we can distinguish between an "idle" mode and a "presenting" mode. During idle mode, segment are typically chosen at random, on a timer, from a repertoire. The textures and data for idle mode are normally in the browser cache, and can be played back with minimal bandwidth and CPU power. During "presenting" mode, the character runs through one or more segments, typically one sentence in length, from a queue.
By limiting the size of a segment to one sentence or less, we can keep the time required to create and load each segment to a minimum. Furthermore, by loading a few items into a play queue, the client can easily predict what comes next, and can pre-fetch the resources for the next segment even as the current one is playing. Text-to-Speech is somewhat costly to generate, and the latency increases with the size of the request. Requesting one sentence at a time keeps the latency manageable.
You can take advantage of all of these refinements by using the public domain Reference Implementation code.
Next Steps
This tutorial has introduced you to a new way of thinking about character animation.
- The Character API enables characters that are continuous, non-linear, and fully reactive to user input, through a simple CSS image strip mechanism, or through a more efficient HTML5 Canvas texture map mechanism.
- Cloud computing and edge caching let you build your application as if all possible images are available at any time from the cloud. Since an image is fully specified by its URL parameters, novel combinations are created on-the-fly using cloud computing, and then cached at multiple levels for rapid delivery to your app.
- The mechanism works well with modern mobile and desktop browsers, and provides a good tradeoff between local compute power and bandwidth.